How to Use a Grooming Glove on Different Parts of a Dog’s Body
Quick Answer
To properly use a grooming glove, you must adjust your pressure and stroke direction based on the dog’s anatomy. Use firm, sweeping strokes on thick areas like the back, but switch to a very gentle, fingertip-only touch for sensitive zones. Building a proper brushing routine requires treating each body part uniquely.
Quick Steps by Body Part
- Back and Neck: Apply firm, long strokes matching the direction of hair growth.
- Chest Area: Use medium pressure with circular motions to loosen trapped undercoat.
- Belly and Groin: Barely touch the skin, using only the side of your thumb.
- Legs and Joints: Support the limb with one hand while using short downward flicks.
- Face and Ears: Avoid the main palm pad entirely and gently use the glove’s fingertips.
I remember the first time I bought a pet shedding mitt, convinced it would solve all my fur problems instantly. I quickly learned that you can’t just pet your dog aggressively everywhere and expect good results.
Grooming gloves are incredibly effective tools for lifting loose hair. However, they require a specific approach depending on which physical zone you touch.
Using the same heavy hand on a bony leg as you do on a thick neck will severely irritate your dog. Here is how to adjust your technique perfectly for every area.


Why Pressure and Direction Matter
Dogs have drastically different skin thicknesses across their bodies. The back is heavily padded with muscle, while the belly is highly sensitive and exposed.
Rubber grooming nodules can feel like a fantastic massage on thick muscle tissue. On thin skin, those exact same nodules feel scratchy and uncomfortable.
- Thickest skin: Neck, shoulders, and along the spine.
- Medium skin: Chest, outer thighs, and upper tail.
- Thinnest skin: Belly, armpits, groin, and inner ears.
The Back and Shoulders: Your Starting Point
 Save
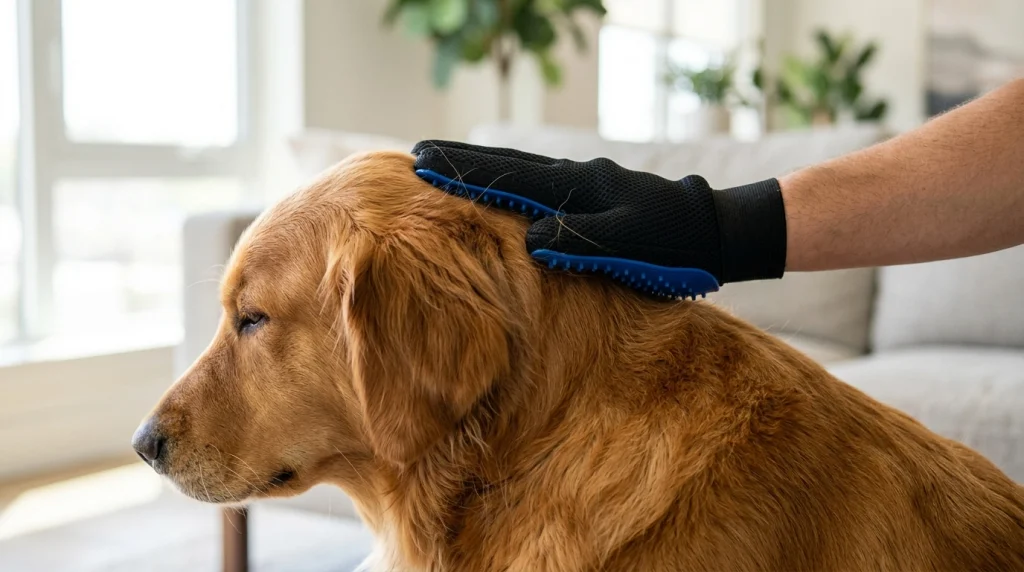
Always begin your session on the dog’s back and shoulders. This region is the least sensitive, making it the perfect place to build trust.
Start right behind the ears and use long, continuous strokes down toward the tail. You can apply firm pressure here without worrying about causing pain.
If you want to stop excessive dog shedding, spend the most time on these upper quadrants. This is where the thickest undercoat lives.
Handling the Chest and Neck
The chest is usually a highly requested scratch zone for most dogs. Because of this, they will likely lean into the glove when you brush here.
Use moderate pressure and try incorporating small circular motions. This technique lifts dead hair efficiently while stimulating natural skin oils.
- Keep the chin elevated slightly with your free hand.
- Brush down the front of the throat in short, gentle passes.
- Pay special attention to the deep chest where collars trap loose fur.
The Belly and Groin: High Sensitivity Zones
 Save
The belly is entirely different and requires a much softer touch. Dogs are naturally protective of their vulnerable undersides.
Never use the flat palm of the glove on a dog’s stomach. Instead, tilt your hand and use just the side of your thumb or index finger.
If your pet gets anxious when groomed, it usually happens when you rush this area. Barely skim the surface of the fur.
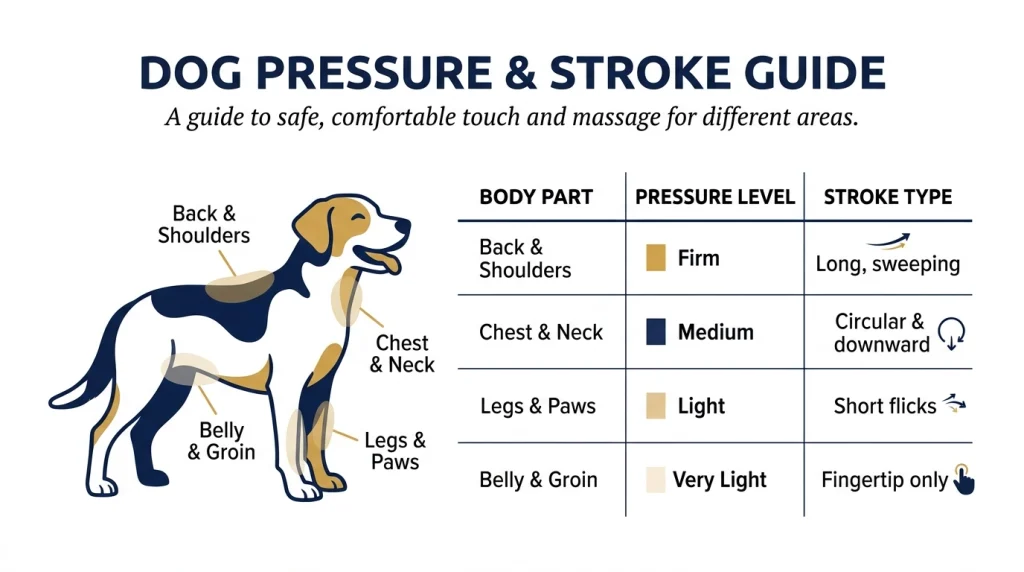
| Body Part | Pressure Level | Stroke Type |
|---|---|---|
| Back & Shoulders | Firm | Long, sweeping |
| Chest & Neck | Medium | Circular & downward |
| Legs & Paws | Light | Short flicks |
| Belly & Groin | Very Light | Fingertip only |
Navigating the Legs and Paws
Legs are exceptionally bony and lack the protective muscle padding found on the main torso. The hard rubber tips of a glove can easily bruise the shin bones.
Always support the leg with your free hand by gently holding the elbow or knee joint. Use short, rapid downward flicks rather than long dragged strokes.
- Skip the actual paws entirely with the glove.
- Brush down the outside of the thigh, never pushing upward.
- Avoid the delicate tendons right above the heel.
The Face, Ears, and Tail
You should never use the main palm pad directly on your dog’s face. The dense rubber nodules are far too stiff for their delicate facial features.
Fold the glove slightly and use only the tip of one finger to gently wipe away loose hair on the cheeks. Keep the tool completely away from their eyes.
For the tail, hold the base firmly with one hand to prevent pulling. Run the glove down the length of the tail using very light, cautious pressure.
According to veterinary experts at the American Veterinary Medical Association, rough handling of the tail base can cause unnecessary spinal discomfort.
What to Do If Your Dog Hates the Glove
 Save
Some dogs instantly panic when they see a large, rubbery hand approaching them. This is usually due to poor introduction methods rather than the tool itself.
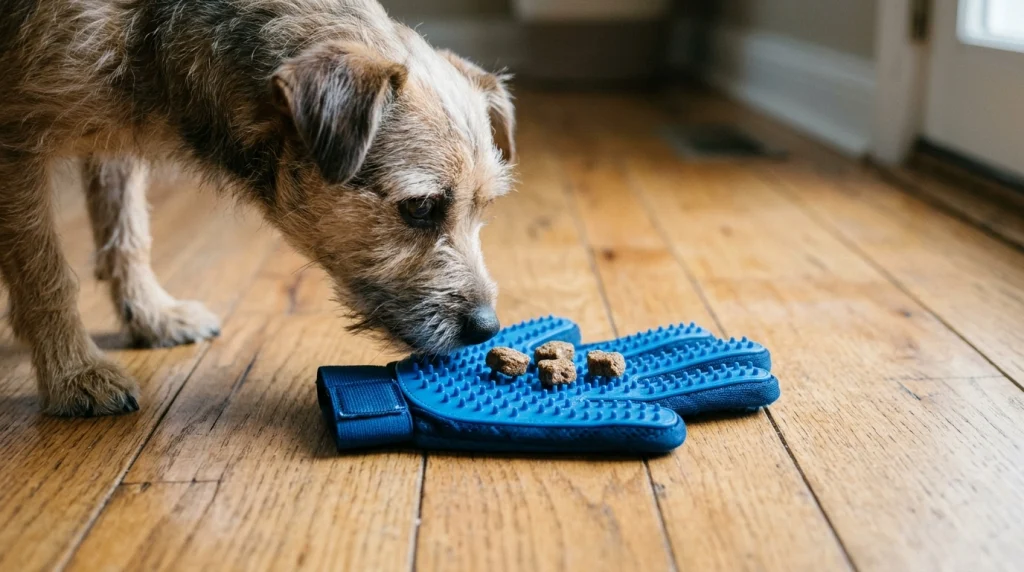
Let them sniff the glove thoroughly while it rests flat on the floor. Place treats directly on the rubber surface so they associate it with a reward.
- Put the glove on and simply feed them dinner with that hand.
- Do one single stroke on their back, then offer a high-value treat.
- Keep initial sessions under two minutes.
If you’re ready to pick one, here is what I actually recommend based on real-world use:
🏆 BEST OVERALL
Pat Your Pet Grooming Glove
★★★★★
Features 255 silicone grooming tips and a breathable mesh back. I love this one because the nodules are soft enough for the chest, yet firm enough to grab thick topcoats easily.
🐾 BEST FOR SENSITIVE ZONES
HandsOn Pet Grooming Gloves
★★★★☆
Fitted five-finger design with rounded rubber nodes on the fingers. This is my absolute go-to when I need to carefully navigate around bony legs, ears, and belly areas.
💧 BEST FOR BATH TIME
Bodhi Dog Bath Glove
★★★★☆
Constructed entirely of waterproof silicone without fabric backing. I use this exclusively in the tub to scrub in shampoo, as it dries instantly and never traps mildew.
Frequently Asked Questions
Do grooming gloves work on short-haired dogs?
Yes, they are highly effective for short-haired breeds. Unlike metal rakes that can scratch exposed skin, the rubber tips grab loose topcoat hairs safely while massaging the dog.
Can you use a grooming glove on a wet dog?
You absolutely can, and many owners use them during baths to lather shampoo deep into the coat. Just ensure the glove has a waterproof or quick-drying mesh back to prevent bacterial growth.
How do you clean a grooming glove?
Peel the accumulated mat of fur off the rubber surface starting from the wrist and pulling upward. Afterward, wash the glove with warm water and mild dish soap, then let it air dry completely.
Are gloves better than traditional slicker brushes?
According to coat care resources at Cornell University College of Veterinary Medicine, it depends on the coat type. Gloves excel at removing surface hair and distributing oils, while slicker brushes are better for untangling deep mats.
Final Thoughts on Proper Technique
Mastering the grooming glove comes down to reading your dog’s body language. If they flinch or pull away, you are likely applying too much pressure for that specific body part.
Stay mindful of the bony areas, keep your strokes gentle on the belly, and utilize firm pressure only on the heavily muscled back. This simple adjustment turns a stressful chore into a highly rewarding bonding experience.
Thomas Cutter is a lifelong dog owner and the founder of FindOutAboutDogs.com. With over 10 years of hands-on experience owning multiple breeds, Thomas created this site to provide honest, research-based dog advice that real owners can actually trust.
