How Does an Undercoat Rake Work? Simple Guide
Quick Answer
An undercoat rake works by passing longer metal teeth through a dog’s outer coat and reaching the softer, loose undercoat underneath. As you pull the rake gently in the direction of hair growth, its teeth collect dead undercoat before that fur falls around your home. This is especially useful for double-coated dogs, as explained in my guide to choosing a brush for a Husky.
How an undercoat rake works
- Reaches below: Long teeth pass through the guard hairs toward the dense undercoat.
- Catches loose fur: Dead undercoat collects between the rake’s teeth as you make each stroke.
- Reduces shedding: Removing already-loose hair means less fur reaches your flooring, furniture, and clothes.
- Separates packed coat: Wider teeth can loosen lightly packed undercoat before finer teeth remove more loose hair.
- Protects the topcoat: Gentle technique targets loose undercoat without intentionally removing healthy guard hairs.
The important part
- Use light pressure and stop if the rake catches sharply, scratches the skin, or causes discomfort.
If you’ve ever brushed a fluffy dog and wondered why hair keeps appearing an hour later, you’re probably seeing loose undercoat. An ordinary surface brush may not reach it.
An undercoat rake is built for that deeper layer. Here’s exactly what it does, which dogs benefit, and how I recommend using one safely.


What Is an Undercoat Rake?
An undercoat rake is a dog-grooming tool with one or more rows of relatively long metal teeth designed to reach loose hair beneath the outer coat. It’s mainly useful on dogs with dense or double coats.
A double coat has two noticeably different layers. The upper layer consists of tougher guard hairs, while softer and usually denser hair forms the undercoat beneath it.
- Guard coat: Longer outer hairs that help protect the skin and underlying coat.
- Undercoat: Softer, denser hair that provides insulation and may shed heavily.
- Loose undercoat: Hair that has finished its growth cycle and is ready to release.
- Undercoat rake: A tool designed to reach and collect that loose deeper hair.
The American Kennel Club’s dog-brush guidance describes undercoat rakes as tools whose metal pins penetrate to the undercoat and remove loose fur.
How Does an Undercoat Rake Actually Remove Hair?
 Save
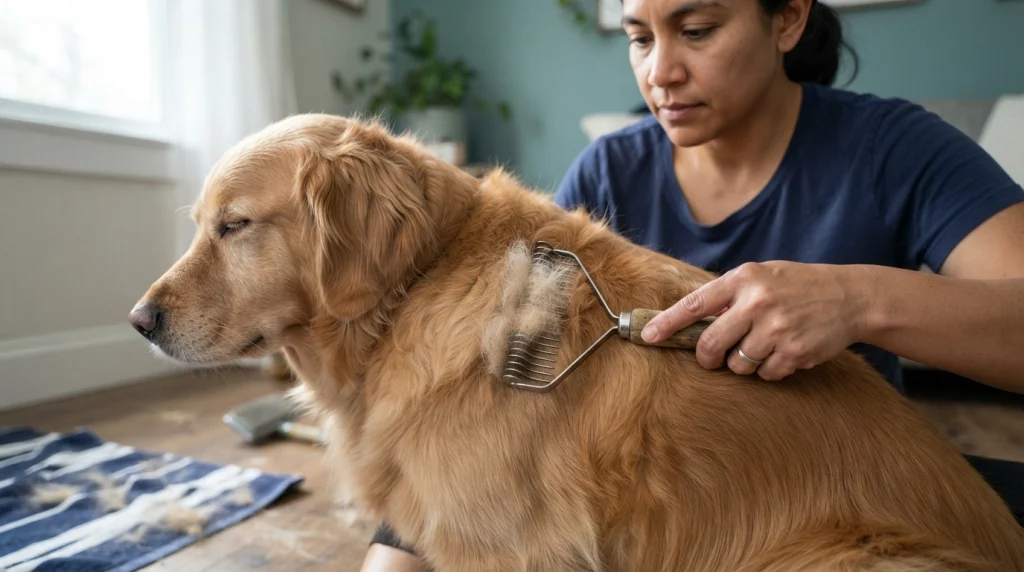
SaveThe rake removes hair mechanically: its teeth travel between coat fibers and catch undercoat that is already loose or lightly packed. Your pulling motion carries that hair out of the coat.
Think of it more like combing through layers than scraping hair away. A properly used rake shouldn’t require hard downward pressure.
- The teeth enter the coat. Their length lets them move past much of the visible outer hair.
- They reach the softer layer. Loose undercoat slides between and around the metal teeth.
- Released hairs collect. As you move the rake through the coat, loose fibers gather on the tool.
- You lift the rake away. The collected hair comes out instead of remaining trapped in the coat.
- You repeat in sections. Working gradually prevents excessive passes over one patch of skin.
This is why I prefer several short, controlled strokes over one hard pull. If a rake stops abruptly, I don’t force it through.
Resistance may mean you’ve reached a tangle, mat, dense packed coat, or an area where the teeth are simply too long for that dog.
Undercoat Rake vs. Slicker Brush: What’s the Difference?
An undercoat rake is primarily for reaching loose deeper coat, while a slicker brush is better for general brushing, separating hair, light tangles, and finishing. Many double-coated dogs benefit from both.
| Tool | Main Job | Undercoat Reach | Best Use | Main Caution |
|---|---|---|---|---|
| Undercoat rake | Remove loose undercoat | High | Dense double coats | Don’t press into skin |
| Slicker brush | Separate and finish coat | Medium | Routine brushing and light tangles | Repeated pressure can irritate skin |
| Steel comb | Check for remaining tangles | Medium | Final coat check | Never yank through resistance |
| Rubber brush | Lift surface hair | Low | Shorter coats | May not penetrate dense coats |
The ASPCA’s grooming guidance also emphasizes matching the grooming tool and brushing routine to the dog’s coat type.
Which Dogs Benefit Most From an Undercoat Rake?
Undercoat rakes work best on dogs with enough undercoat for the teeth to reach and collect. They’re especially useful during periods of heavier seasonal shedding.
Many northern, herding, working, and retriever breeds carry double coats. Coat density still varies significantly between individual dogs.
- Siberian Husky: Dense undercoat and seasonal coat shedding make a rake especially useful.
- German Shepherd: A rake can help remove loose material from the dense double coat.
- Golden Retriever: The undercoat beneath the feathered outer coat can release substantial loose hair.
- Labrador Retriever: Even the short outer coat can hide a dense undercoat underneath.
- Australian Shepherd: Longer outer hair can make reaching loose undercoat important.
- Border Collie: Many Border Collies have enough undercoat to benefit from deeper grooming.
- Newfoundland: Thick coat density makes careful section-by-section grooming especially important.
For a good real-world example, see my guide on managing shedding in a Siberian Husky.
The AKC’s double-coated dog guide also explains why the undercoat and protective topcoat need different grooming attention.
How Do You Use an Undercoat Rake Correctly?
 Save
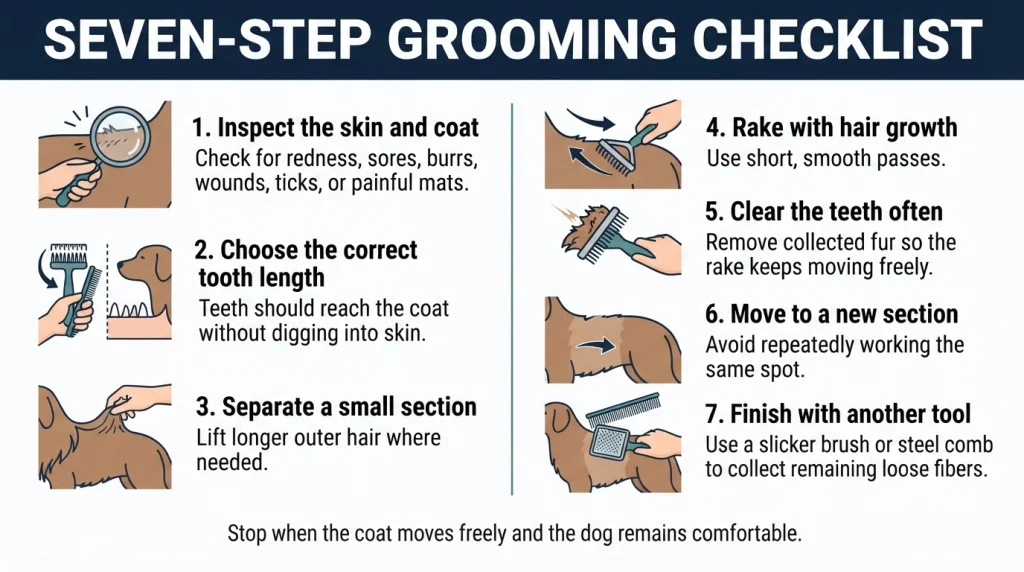
SaveUse an undercoat rake on a dry, inspected coat with light pressure and short strokes following the direction of hair growth. Work one small area at a time.
Don’t treat the tool like a garden rake. More pressure doesn’t automatically remove more useful hair.
- Inspect the skin and coat. Check for redness, sores, burrs, wounds, ticks, or painful mats before starting.
- Choose the correct tooth length. The teeth need enough reach for the coat without digging into the skin.
- Separate a small section. Use your free hand to lift longer outer hair where needed.
- Rake with hair growth. Make short, smooth passes rather than dragging aggressively.
- Clear the teeth often. A rake packed with hair can’t move through the coat efficiently.
- Move to a new section. Avoid repeatedly working the same spot simply because more hair appears.
- Finish with another tool. A slicker brush or steel comb can collect remaining loose fibers and check your work.
My simplest stopping rule is comfort plus coat movement. When the area feels freer and the tool passes smoothly, I move on.
I don’t try to make the rake come out completely empty. A dog can continue releasing hair without needing endless passes over the same skin.
Can an Undercoat Rake Cut or Damage a Dog’s Coat?
A traditional rounded-pin rake mainly separates and collects hair, but some de-shedding or dematting tools use sharper edges that behave differently. Tool design matters.
This distinction is easy to miss because manufacturers use terms such as rake, de-shedder, dematting rake, and grooming comb loosely.
- Rounded-pin rake: Usually focuses on reaching and pulling loose coat.
- Bladed de-shedding tool: Uses an edge that can remove substantially more hair per pass.
- Dematting rake: May use sharpened or hooked teeth intended to split tangles and mats.
- Double-sided rake: Often provides wider spacing on one side and finer spacing on the other.
Check the actual tooth design before buying. Don’t assume every product labeled an “undercoat rake” works identically.
How Much Pressure Should You Use?
Use only enough pressure to guide the teeth through the coat. You shouldn’t need to push the tool firmly against your dog’s skin.
I like to test a new rake slowly on an easy area such as the shoulder or side. That tells me how the coat reacts before I reach thinner or more sensitive areas.
- Stop if the dog flinches repeatedly.
- Stop if the skin turns red.
- Stop if the rake suddenly catches.
- Don’t scrape repeatedly over one patch.
- Use extra care around legs, belly, armpits, ears, and other thinly covered areas.
If you discover tight mats close to the skin, an ordinary undercoat rake may not be the right solution. Severe matting is often safer in the hands of an experienced groomer.
How Often Should You Use an Undercoat Rake?
There isn’t one schedule for every dog. Frequency should depend on coat density, shedding level, season, skin condition, and how much loose undercoat you find.
As of 2026, I still prefer adjusting grooming to the individual coat instead of following a rigid daily schedule.
- Normal shedding: Include the rake when you notice loose undercoat during routine brushing.
- Heavy coat blow: Shorter, more frequent sessions may be easier than one long session.
- Minimal loose coat: Don’t keep raking simply because your schedule says it’s grooming day.
- Sensitive skin: Reduce frequency and pressure, and consider a gentler tool.
The goal is to remove coat that’s ready to leave. It isn’t to strip away every soft hair underneath the guard coat.
Common Undercoat Rake Mistakes
 Save
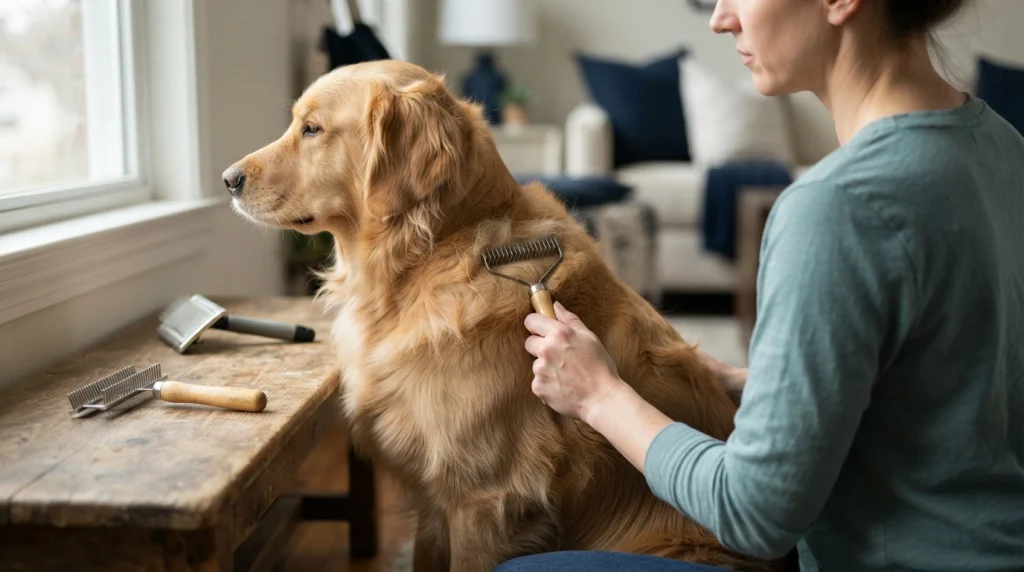
SaveMost problems come from using too much pressure, choosing the wrong tool, or repeatedly grooming the same area. Good technique feels controlled rather than aggressive.
- Pressing too hard: Metal teeth can irritate skin when they’re pushed downward.
- Forcing through tangles: Hard resistance is a reason to stop and inspect the coat.
- Using teeth that are too long: Excessive length may cause the rake to contact skin unnecessarily.
- Using teeth that are too short: The tool may skim the surface without reaching loose undercoat.
- Overworking one spot: Repeated passes can cause redness even when the first few strokes were comfortable.
- Raking every coat type: Dogs without substantial undercoat may need a different brush altogether.
A bigger pile of fur isn’t automatically proof of better grooming. Comfort and proper coat condition matter more.
Undercoat Rakes I Would Consider
If you’re ready to choose one, I would focus on tooth design, coat density, and how much control the handle gives you.
🏆 Best Versatile Pick
Maxpower Planet Double-Sided Undercoat Rake
★★★★½
Its dual-sided design uses wider and finer-spaced teeth for different coat conditions. I like this format when I want one tool that can start on thicker packed areas before moving to finer undercoat removal.
🐕 Best Simple Rake
Safari Double Row Undercoat Rake
★★★★☆
This traditional double-row format focuses on reaching and collecting loose undercoat without unnecessary extras. I would consider it for owners who want a straightforward dedicated grooming rake.
🧩 Best for Tangles Plus Shedding
GoPets Dematting Comb
★★★★☆
This is closer to a dematting and de-shedding tool than a basic rounded-pin rake. I would consider it when tangles are part of the problem, while using extra care because bladed teeth behave differently from traditional rake pins.
Frequently Asked Questions
Does an undercoat rake pull out healthy fur?
A properly chosen traditional rake should mainly collect loose undercoat, but any grooming tool can pull attached hair if used too aggressively. Use light pressure, follow hair growth, and stop when you encounter strong resistance instead of forcing the teeth through.
Can I use an undercoat rake every day?
You may use one more frequently during heavy seasonal shedding, but daily raking isn’t automatically necessary. Watch the amount of loose undercoat and your dog’s skin. If little hair is coming out or the skin becomes sensitive, reduce the frequency.
Should I use an undercoat rake before or after a slicker brush?
For a dense shedding coat, I usually use the rake for deeper loose undercoat and then finish with a slicker brush. The slicker helps collect loosened surface hair, separate the coat, and tidy areas where a rake isn’t the best tool.
Can an undercoat rake remove mats?
A normal undercoat rake may loosen lightly packed fur, but it isn’t automatically a safe mat-removal tool. Tight mats can sit close to the skin. Don’t force a rake through them, and get professional grooming help when matting is severe or painful.
Is an undercoat rake good for short-haired dogs?
It depends on the coat rather than hair length alone. A short-haired Labrador can have a substantial undercoat, while another short-coated dog may not. Choose a rake only when its tooth length and design suit the actual density of your dog’s coat.
Final Takeaway
An undercoat rake works by reaching beneath the visible guard hairs and collecting loose, dead undercoat before it sheds naturally around your home. Its effectiveness comes from tooth length and spacing, not force.
Choose a rake that matches your dog’s coat, use light strokes, and stop whenever the tool catches or the skin looks irritated. Done correctly, a rake can make maintaining a heavy double coat much easier for both you and your dog.

Thomas Cutter is a lifelong dog owner and the founder of FindOutAboutDogs.com. With over 10 years of hands-on experience owning multiple breeds, Thomas created this site to provide honest, research-based dog advice that real owners can actually trust.
