How to Use an Undercoat Rake Correctly: A Step-by-Step Guide
Quick Answer
To use an undercoat rake correctly, work through your dog’s dry coat in small sections, moving the rounded teeth gently in the direction of hair growth. Let the tool lift loose undercoat without scraping the skin or pulling healthy guard hairs. For more help choosing the right grooming tool, see this guide to the best brush for a Husky.
Five steps for safe undercoat raking
- Inspect the coat: Check for sores, sensitive skin, tight mats, and tangles before brushing.
- Choose the right rake: Match the tooth length and spacing to your dog’s coat.
- Start gently: Hold the rake comfortably and use light, short strokes.
- Work in sections: Separate thick fur and follow the natural direction of growth.
- Check your progress: Stop when loose hair decreases and the coat feels comfortable, then inspect it with a suitable comb.
Keep your dog comfortable
- Never press harder to remove stubborn hair or repeatedly rake the same patch.
- Avoid inflamed skin and painful mats; ask a professional groomer or veterinarian for help when needed.
An undercoat rake can make shedding season much easier, especially if you live with a Husky, German Shepherd, Golden Retriever, or another double-coated dog. However, the right technique matters just as much as the tool itself.
When grooming a thick coat, the goal isn’t to pull out as much fur as possible. It’s to remove loose undercoat while protecting the healthy outer coat and keeping your dog relaxed.
In this guide, I’ll explain how to use an undercoat rake step by step, how much pressure to apply, which areas need extra care, and how to recognize when it’s time to stop.


What Is an Undercoat Rake?
An undercoat rake is a dog grooming tool with long metal teeth designed to reach beneath the outer coat and lift loose, dead undercoat. It’s especially useful for many double-coated breeds that shed heavily during seasonal coat changes.
Unlike a standard bristle brush, an undercoat rake targets loose hair deeper in the coat rather than focusing mainly on the surface. Its effectiveness depends on the rake’s design, your dog’s coat type, and how gently you use it.
How does an undercoat rake work?
A double-coated dog has two main layers of fur, and each serves a different purpose.
- Undercoat: The softer, denser layer that provides insulation and often sheds heavily.
- Guard hairs: The stronger outer hairs that help protect the skin from moisture, dirt, and environmental exposure.
The rake’s teeth move through the outer hair to collect loose undercoat underneath. Used correctly, the tool removes shedding hair without needing to scrape the skin or forcefully pull through the coat.
The American Kennel Club’s double-coat grooming guidance explains why appropriate tools and regular maintenance matter for these coats.
Which Dogs Should Use an Undercoat Rake?
 Save
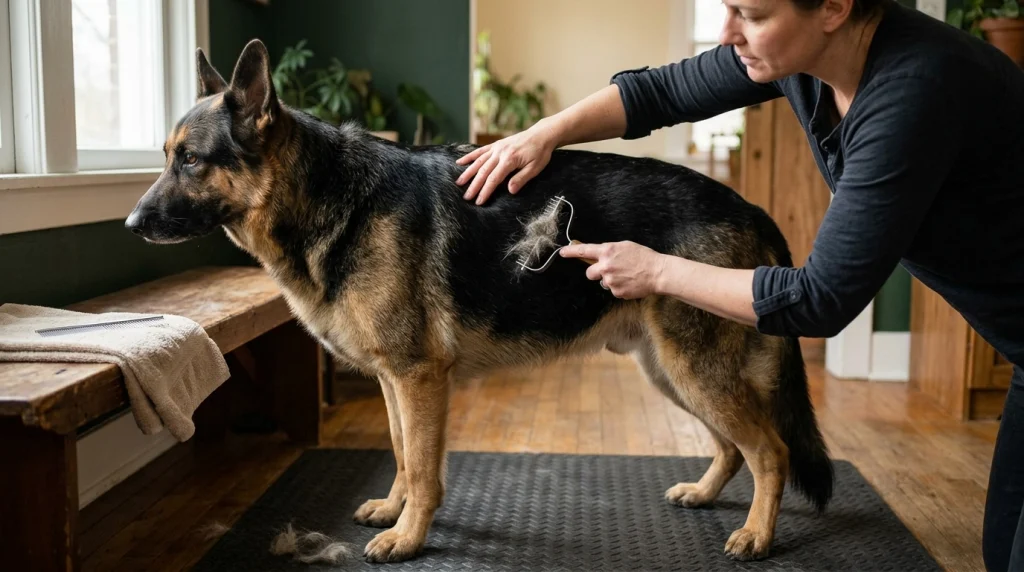
SaveUndercoat rakes are generally suited to dogs with a substantial undercoat, including many northern, herding, sporting, and working breeds. The exact tool should match the length, density, and condition of your dog’s fur.
- Siberian Huskies: Their dense coats can release large amounts of undercoat during seasonal shedding.
- German Shepherds: Many have a thick undercoat that benefits from regular maintenance.
- Golden Retrievers: Their feathering and dense coat can trap loose hair, although a rake must suit their coat length.
- Australian Shepherds: Their medium-length double coats can benefit from careful undercoat removal.
- Samoyeds: Their abundant coat needs suitable tools and patient, section-by-section grooming.
Don’t assume every dog with long fur needs a rake. Single-coated dogs, curly-coated breeds, and dogs with thin or sensitive coats may need different grooming tools.
If you’re unsure whether your dog has a double coat, ask your veterinarian or groomer to help identify the coat type before choosing a tool.
How to Use an Undercoat Rake Correctly
The safest method is to work slowly through small sections, using gentle strokes that follow the direction of hair growth. You should feel the rake moving through loose hair, not dragging the skin or snagging firmly attached fur.
Step 1: Inspect your dog’s coat and skin
Before picking up the rake, run your hands gently over your dog’s body and look for problem areas. Check for redness, sores, bumps, burrs, tangles, and mats close to the skin.
Don’t rake over irritated skin or try to force the tool through a tight mat. These areas may need professional attention before ordinary grooming can continue safely.
Step 2: Choose a rake that fits the coat
Tooth length matters because the teeth must reach loose undercoat without digging into the skin. A rake with teeth that are too short may only skim the surface, while an unsuitable long-toothed design may catch or scratch.
Look for smooth, well-finished teeth and a handle that gives you good control. Rounded or appropriately finished tips can help reduce scratching, but they don’t make forceful brushing safe.
Step 3: Position the rake correctly
Hold the rake so its teeth enter the coat gently and lie in line with the direction of hair growth. Keep your wrist relaxed instead of pushing the tool down toward the skin.
Start on an easy area, such as the upper back or side, where your dog can stand or lie comfortably. Let your dog get used to the sensation before moving toward more sensitive areas.
Step 4: Use short, gentle strokes
Move the rake through a small section with controlled strokes in the direction the hair naturally grows. Lift the tool away at the end of each stroke rather than dragging it repeatedly over the same patch.
Use only enough pressure to guide the teeth through the coat. If the rake catches, stop and investigate instead of pulling harder.
- Keep the strokes short enough to maintain control.
- Remove collected fur from the teeth frequently.
- Check the skin if your dog flinches or moves away.
- Give your dog a short break if they become restless.
Step 5: Work through one section at a time
Divide the coat into manageable areas instead of repeatedly brushing across the whole body. You can use your free hand to separate the outer hair gently and see where the rake needs to reach.
Move to the next section once the current area releases less loose undercoat and the rake passes comfortably. Don’t chase every remaining hair; healthy dogs naturally continue shedding between grooming sessions.
Step 6: Finish with a coat check
After raking, use a suitable slicker brush or metal comb if your dog’s coat benefits from one. These tools can collect loosened hair, separate the coat, and reveal tangles the rake may have missed.
For dense or longer coats, a comb that passes through the finished section without repeatedly catching is a useful practical check. Never force it through resistance.
For a closer look at this final step, see my guide on why using a dog brush and comb together can help.
Which Areas Need Extra Care?
Some parts of a dog’s body are more sensitive or harder to groom because the skin moves easily, the coat is thinner, or the fur forms tangles. Use extra caution around these areas and choose a different tool if the rake doesn’t move comfortably.
- Behind the ears: The skin is delicate, and longer hair can form tight tangles.
- Under the front legs: Movement and friction can create knots near the armpits.
- Groin and belly: These areas often have more sensitive skin and thinner hair.
- Tail and feathering: Longer hair may tangle or snag if the teeth catch it.
- Hips and hindquarters: Dense undercoat can collect here on some breeds.
- Neck and collar area: Friction can cause tangles, especially in dogs with thick ruffs.
For sensitive areas, a softer brush or a suitable comb may offer better control. If your dog shows pain, stop and assess the area rather than trying to finish the grooming session.
How Much Pressure Should You Apply With an Undercoat Rake?
Use light, controlled pressure that allows the teeth to travel through loose hair without scraping the skin. An undercoat rake should do the work through its design, not through the strength of your hand.
Here’s a simple test I recommend: make a few gentle passes over an easy section, then check your dog’s reaction and inspect the skin. If the coat releases loose fur comfortably, there’s no need to press harder just to collect more hair.
- Good technique: The rake glides through loose undercoat with minimal resistance.
- Too much pressure: The teeth pull the skin, leave redness, or make your dog flinch.
- Wrong tool or technique: The rake repeatedly catches, pulls healthy hair, or struggles through tangles.
A large pile of collected fur doesn’t automatically mean you’ve groomed better. Comfort, healthy skin, and a coat that remains in good condition are more useful measures of success.
Undercoat Rake vs. Slicker Brush vs. Deshedding Tool
 Save
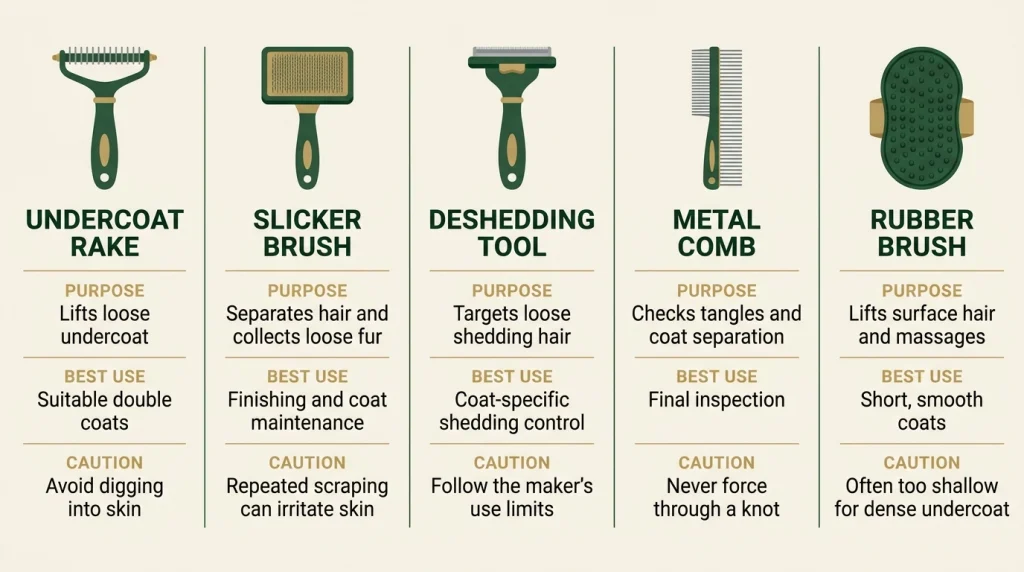
SaveThese tools can all help manage loose hair, but they aren’t interchangeable. An undercoat rake targets loose undercoat, a slicker brush helps separate hair and finish the coat, and a deshedding tool uses its own specific edge or tooth design to collect loose hair.
| Tool | Main purpose | Best use | Main caution |
|---|---|---|---|
| Undercoat rake | Lifts loose undercoat | Suitable double coats | Avoid digging into skin |
| Slicker brush | Separates hair and collects loose fur | Finishing and coat maintenance | Repeated scraping can irritate skin |
| Deshedding tool | Targets loose shedding hair | Coat-specific shedding control | Follow the maker’s use limits |
| Metal comb | Checks tangles and coat separation | Final inspection | Never force through a knot |
| Rubber brush | Lifts surface hair and massages | Short, smooth coats | Often too shallow for dense undercoat |
For many double-coated dogs, a suitable rake and a finishing brush make a useful combination. The best setup depends on the coat, so you don’t need to buy every tool listed above.
How Often Should You Use an Undercoat Rake?
There isn’t one schedule that suits every breed. Start with your dog’s normal grooming needs, then adjust the frequency according to how quickly loose undercoat builds up.
- Routine maintenance: Begin with a weekly coat check and brush as needed for your dog’s coat.
- Heavy seasonal shedding: Use shorter, more frequent sessions when loose undercoat increases.
- Long or dense coats: Check regularly for tangles and packed hair beneath the surface.
- Sensitive skin: Use less frequent, gentle sessions and ask your veterinarian about irritation.
Some dogs benefit from several grooming sessions each week, while others need less. In 2026, the sensible approach remains the same: base the schedule on coat condition and your dog’s comfort rather than a rigid calendar.
During a seasonal coat change, you may still see loose hair after grooming. That’s normal; the aim is to manage shedding, not stop the natural hair-growth cycle.
What Mistakes Should You Avoid When Using an Undercoat Rake?
Most problems happen when owners use too much pressure, choose an unsuitable tool, or keep working on a stubborn patch. A few simple changes can make grooming safer and less stressful.
- Raking against the grain: Follow the natural direction of growth unless the tool’s instructions specify another method.
- Pressing down hard: Let the teeth reach loose hair without scraping the skin.
- Repeatedly working one spot: Move on when the coat releases less hair or the skin begins to look irritated.
- Using the rake on tight mats: Separate minor tangles carefully with an appropriate tool; leave severe matting to a professional.
- Choosing teeth that are too long: Match the rake to the coat and your ability to control it.
- Ignoring discomfort: Stop if your dog flinches, growls, tries to escape, or shows other signs of pain.
- Expecting zero shedding: Dogs naturally shed, and a rake cannot eliminate that process.
Never use an undercoat rake as a substitute for examining your dog’s skin. Redness, sores, bald patches, persistent itching, or sudden changes in shedding deserve veterinary attention.
The VCA Animal Hospitals guide to grooming and coat care offers further advice on coat maintenance, tangles, and when to seek professional help.
How to Choose a Good Undercoat Rake
 Save
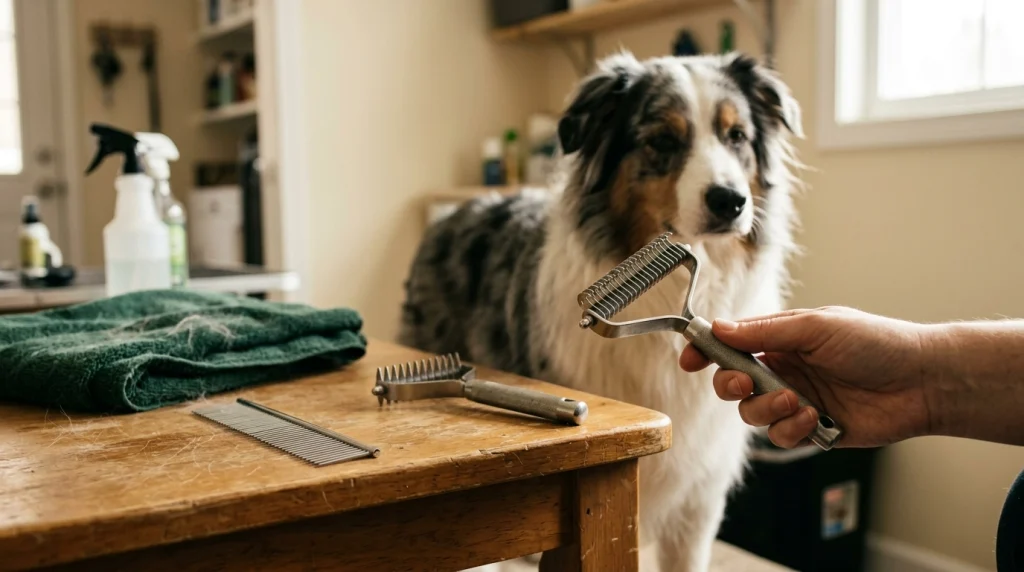
SaveA good rake should suit your dog’s coat and feel comfortable in your hand. Expensive features matter less than appropriate tooth length, smooth construction, and the ability to work without excessive pressure.
- Tooth length: Choose teeth that reach the undercoat without digging into the skin.
- Tooth spacing: Wider spacing may suit some dense coats, while a different design may work better for finer undercoat.
- Rounded or finished teeth: Inspect the tips and edges for rough spots that could scratch or catch hair.
- Handle comfort: A secure grip makes short, controlled strokes easier.
- Coat compatibility: Follow the manufacturer’s guidance for coat length and breed suitability.
Don’t select a rake simply because its packaging promises dramatic hair removal. A tool that removes less hair comfortably may be a better choice than one that encourages aggressive grooming.
Recommended Undercoat Rakes and Grooming Tools
If you’re ready to choose a tool, I’d prioritize a simple rake that suits the coat, then add a finishing brush or comb only if your dog needs one. These are established grooming options to compare; check the current model specifications and choose the correct size before buying.
🏆 Best all-around rake
Maxpower Planet Double-Sided Undercoat Rake
★★★★☆
Its two-sided design offers different tooth configurations for coat maintenance and loose-undercoat removal. I’d compare the tooth spacing and recommended coat types before using either side on a dense coat.
💰 Best simple design
Safari Double Row Undercoat Rake
★★★★☆
This traditional double-row style focuses on reaching loose undercoat without unnecessary extras. I’d consider it when a dog needs a dedicated rake and the selected version matches its coat length.
✨ Best for finishing
Chris Christensen Big G Slicker Brush
★★★★☆
This premium slicker is a separate tool for coat separation and finishing, not a replacement for every undercoat rake. I’d consider it when the coat needs additional brushing after loose undercoat has been removed.
Product prices, sizes, availability, and customer ratings can change. The star symbols above are editorial assessments, not verified live retailer ratings.
Frequently Asked Questions
Should you use an undercoat rake with or against the grain?
Start by moving the undercoat rake in the direction of hair growth, using short, gentle strokes. This approach gives you control and helps reduce pulling. Follow the instructions for your particular tool, and stop if the teeth catch or your dog shows discomfort.
Can an undercoat rake hurt my dog?
Yes, an undercoat rake can irritate or injure skin if you press too hard, use unsuitable teeth, or repeatedly work one area. Choose a rake that fits the coat, apply light pressure, and stop if you notice redness, flinching, or pain.
Can I use an undercoat rake on a short-haired dog?
Some short-haired double-coated dogs can benefit from an appropriately sized undercoat rake, but not every short coat needs one. Check the manufacturer’s coat-length guidance and consider a rubber brush or other gentler tool if the rake doesn’t move comfortably.
How long should I use an undercoat rake in one session?
There is no universal time limit because coat density, shedding, and tolerance vary. Start with a short session, work through a few sections, and take breaks as needed. Stop when the dog becomes uncomfortable or the skin shows irritation rather than aiming for a specific duration.
Should I use an undercoat rake on wet fur?
For routine undercoat removal, a dry coat is a practical starting point unless the tool’s instructions say otherwise. Wet or tangled hair can catch more easily, and existing mats may tighten during bathing. Resolve tangles gently before bathing or seek professional help for severe matting.
Final Takeaway: Use an Undercoat Rake Gently and Deliberately
Learning how to use an undercoat rake correctly comes down to choosing the right tool, working in small sections, and applying minimal pressure. The aim is to lift loose undercoat while leaving healthy guard hairs and comfortable skin intact.
Start slowly, check your dog’s reaction, and use a suitable brush or comb to finish when needed. If the coat is tightly matted or the skin looks irritated, pause and seek professional advice instead of pushing through.
With a patient routine and the right grooming tools, you can manage loose fur more effectively without turning brushing into an uncomfortable experience for your dog.

Thomas Cutter is a lifelong dog owner and the founder of FindOutAboutDogs.com. With over 10 years of hands-on experience owning multiple breeds, Thomas created this site to provide honest, research-based dog advice that real owners can actually trust.
